Immerse yourself in the world of creativity and personal touch with our DIY invitation station ideas. Whether it’s a birthday party, wedding, baby shower, or a simple get-together, your invitation sets the tone for the occasion. This post will help you explore various do-it-yourself ideas that can make your invitations stand out and leave your guests eagerly waiting for the special day.
Discover endless possibilities of DIY invitation crafting right at home. By opting for a DIY approach, you can infuse a unique personality and charm to your party invitations. From the materials to be used to the design and personal message, you have complete control over how your invitation will look like. This ensures that your invitation reflects the theme and essence of the party perfectly.
In the following sections, we will delve into a plethora of DIY invitation station ideas suitable for every occasion. Be it elegant, rustic, playful, or modern themes, we’ve got you covered. Moreover, we also have tips and tricks for you on how to choose the right tools and materials that can make the process a breeze. You’ll discover how different textures, color palettes, and embellishments can dramatically elevate the visual appeal of your invitations, turning simple designs into standout pieces.
This is more than a simple guide; it’s an invitation to tap into your creative side and make something beautiful. Emojis, stickers, colorful papers, glitters — the sky’s the limit when it comes to designing your DIY invitation. Whether you’re crafting alone, with friends, or organizing a creative station at your event, this process becomes part of the celebration itself. Also, we will touch upon how to add a personal touch to your invitation with heartfelt words that resonate with the party’s theme. From hand-lettered names to custom illustrations and fun pop-up elements, you’ll learn how to infuse personality into every card, making each one feel truly special and unforgettable.
In conclusion, get ready to venture into a fun and fulfilling journey of crafting your perfect party invitations. With the ideas and tips shared in this post, your invites will not just be a piece of information but a keepsake that your guests would love to hold onto. So, let’s start this creative journey and make your party invitations the talk of the town!
Creating a DIY Invitation Workflow for Efficiency
Once you have your materials and theme in mind, organizing a step-by-step workflow is essential. This process helps avoid chaos, save time, and reduce mistakes. Begin by drafting a checklist of each component your invitation will require—such as the base card, layered paper, printed details, embellishments, and envelopes.
Arrange your supplies in stations or zones if possible. For example, a cutting zone, a stamping and ink zone, a gluing station, and a writing area. This method is especially helpful when working in groups. Even if you are crafting solo, having a clearly structured workflow ensures each card is consistent and professionally finished.
Pre-cut as much material as possible in advance. Bundle them together into sets per invitation to streamline the final assembly. Pre-print the event details on high-quality paper or labels to save time and ensure uniformity. These small steps can save hours in the overall process.
Creative Embellishment Techniques for Invitations
Enhancing your invitation with simple but effective embellishments can transform its aesthetic and tactile value. Ribbon bows, fabric strips, sequins, twine, die cuts, glitter pens, embossing powder, brads, and charms are all common additions used by DIYers to add flair.
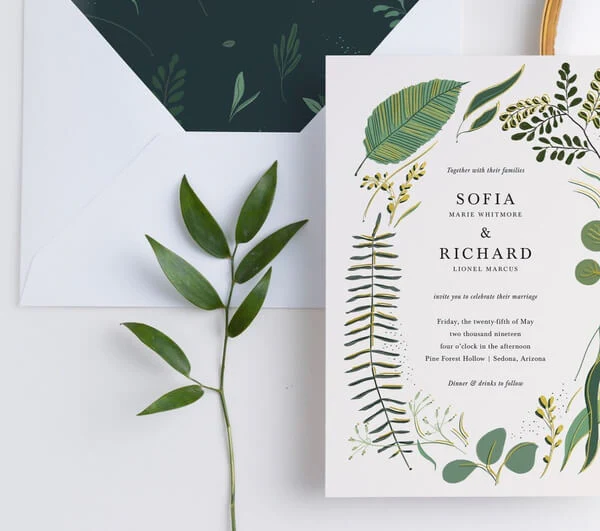
For a rustic or nature-inspired event, consider using dried flowers, leaves, or hand-painted watercolors to give a natural and elegant touch. For luxurious themes, foil sheets and metallic gel pens can introduce shine and texture. Vellum paper layered over printed text can create a soft overlay effect, giving your card a dreamy quality.
Heat embossing is another advanced but highly rewarding technique. Using embossing ink and powder, you can create raised designs that add texture and elegance. Invest in a basic heat tool to explore this option.
Envelope Decoration and Customization
Envelopes are often underestimated, but they are the first element your guest will see. Use the same creativity on the outside as inside. Lining the envelope with decorative paper or patterned inserts adds color and surprise when the envelope is opened.
You can also decorate the front with rubber stamps, washi tape, personalized address labels, or even stickers matching the event theme. Wax seals are an increasingly popular trend, offering a vintage touch that feels formal and special. Custom wax stamps are widely available online and are surprisingly simple to use.
Handwriting addresses using brush pens or metallic markers adds sophistication. For added convenience, you can use printable templates or label makers to maintain uniformity.
Eco-Friendly and Sustainable Invitation Ideas
Eco-conscious hosts can create beautiful invitations while reducing their carbon footprint. Recycled paper, plantable seed paper, and biodegradable embellishments are all sustainable alternatives that still look polished and creative.
Consider sourcing paper from FSC-certified brands or local suppliers who specialize in sustainable stationery. Natural twine or cotton ribbons are excellent alternatives to synthetic options. If you want to go paperless while still keeping a handmade vibe, design your invitation digitally and send a personalized PDF version via email.
Including a QR code or a short link to your RSVP form reduces the need for return mail and simplifies tracking. If you want a physical component, create a minimal postcard-style invite with a scannable RSVP option.
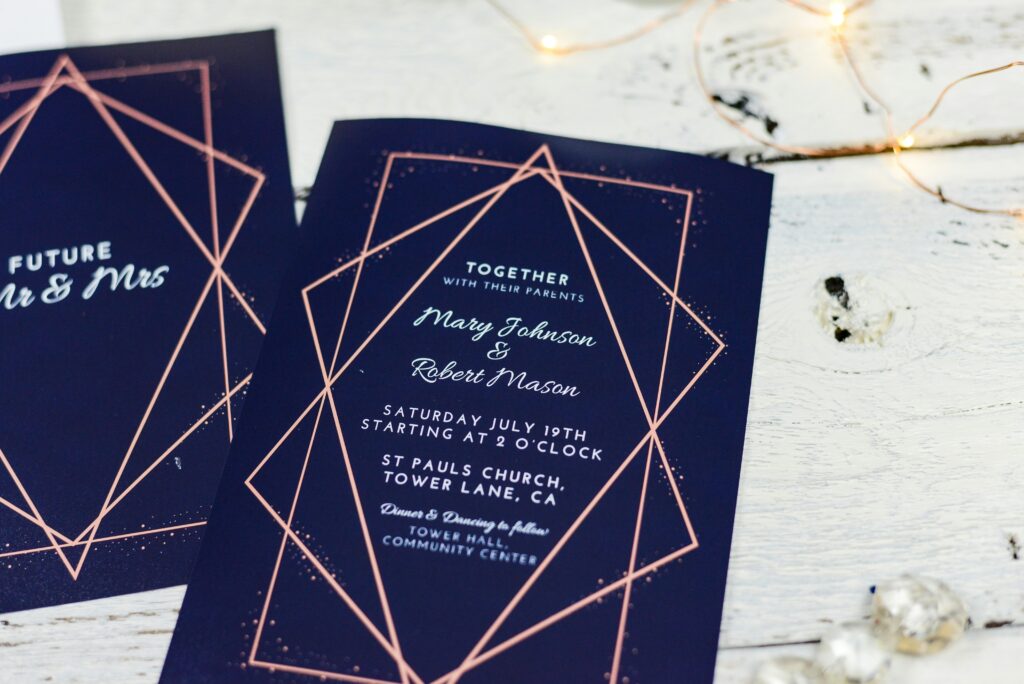
Typography Layout and Hierarchy
When designing an invitation, how the text is structured is just as important as the words themselves. Typography layout influences readability and visual appeal. Stick to two to three fonts per invitation: one for headings, one for body text, and possibly one accent font.
Ensure there is a clear hierarchy in your layout. The event name or purpose should stand out, followed by the date, time, and location. Finally, include RSVP information and any extra notes like dress code or gift instructions.
Experiment with font size, weight (bold vs. regular), and spacing (line height and letter spacing) to make each section easy to scan. If creating digital files, use alignment tools to keep all elements neatly arranged.
Incorporating Photos and Illustrations
For truly personalized invitations, include photos or illustrations. A baby picture for a first birthday, a couple’s engagement photo for a wedding, or a group shot of colleagues for a corporate event adds a warm and intimate element.
These images can be digitally printed or physically attached with clips, washi tape, or photo corners. Alternatively, you can illustrate characters or themes yourself or commission a digital artist for custom portraits or caricatures that reflect the spirit of your gathering.
Illustrated maps are a beautiful touch for weddings or destination events. Create a hand-drawn layout of the venue or nearby attractions, and include it as an insert or print it on the back of the invitation.
Using Mixed Media in DIY Invitations
Blending traditional paper crafts with other materials can elevate your DIY project. Experiment with fabric swatches, leather accents, felt shapes, beads, lace, feathers, buttons, or wood elements like tiny clothespins or laser-cut pieces.
Layering multiple textures makes your invitation tactile and memorable. Try stitching elements together using a sewing machine, or binding your card booklet-style with ribbon or string. Mixed media invites require more time but leave a lasting impression and can even serve as keepsakes.
Themed DIY Invitation Kits for Guests
For an interactive twist, consider sending out “invitation kits” for smaller or private gatherings. These kits can include the basic elements of the invite, allowing recipients to build their own version. It’s a creative icebreaker, especially for events like craft parties or bridal showers.
Include a base card, a few embellishments, stickers, and a message that encourages guests to personalize the card and return it at the event. This playful format turns your invitation into an activity and conversation piece.
Organizing a DIY Invitation Workshop
If you’re planning a wedding, graduation, or large party, you can turn the invitation-making process into a workshop. Gather friends, family, or your planning committee and host a creative evening with snacks, music, and stations set up for each step.
This approach not only speeds up production but also makes it a bonding experience. Print clear instructions for each step and create sample cards as references. Label trays or bins for supplies and clean-up. The social environment adds energy and makes the workload feel lighter.
Budget-Friendly Tips for DIY Invitations
DIY does not mean expensive. To stay within budget, buy materials in bulk, use printable templates, and repurpose items from previous craft projects. Dollar stores, clearance aisles, and online marketplaces often offer great deals on paper, pens, stamps, and adhesives.
Another trick is to mix handmade with pre-made elements. Use pre-cut card bases and simply add your own embellishments or calligraphy. Consider limiting high-cost elements like foil printing or custom stamps to a few VIP invitations, while keeping the general batch simple but elegant.
Storing and Protecting Finished Invitations
Once your invitations are complete, proper storage is essential to preserve their quality. Use flat boxes with tissue paper between each layer. Avoid stacking heavy items on top. If using embellishments like glitter or glue, allow them to dry completely before stacking to prevent smudging or sticking.
If you’re mailing them, visit the post office to weigh a complete sample. Handmade cards often require extra postage or special handling due to their unique textures or added elements. Avoid placing cards in mailboxes if they could be exposed to rain—padded envelopes or clear sleeves can offer protection during delivery. Consider including a protective backing inside the envelope for added support and to maintain the card’s shape during transit, especially for the inclusion of handmade touches, like ribbons, glitter, or embossed details.
Final Thoughts
Crafting your perfect party begins with a well-designed invitation, setting the tone and theme for the event. With a well-equipped DIY invitation station and a good grasp of the basics, anyone can create personalized and unique invitations for every occasion. Whether you prefer traditional methods or digital tools, the possibilities are endless and only limited by your creativity. From experimenting with textures and layers to incorporating photos, colors, and meaningful messages, each element allows you to express your personal style. The joy of creating something by hand adds not only charm to the invitation but heart to the entire celebration.
Conclusion
As we reflect on the full spectrum of possibilities offered by DIY invitation stations, it’s clear that this creative approach is more than a crafting trend—it’s a celebration of personalization and meaningful connections. In a world increasingly dominated by mass-produced experiences, taking the time to design and assemble your own invitations stands out as a genuine act of thoughtfulness. It sends a message to your guests that they matter, and that your event is crafted with care from the very first detail. 💌✨
Beyond the aesthetic appeal, DIY invitation stations provide a powerful emotional layer to your event preparation. Whether you’re creating them alone in a quiet moment of reflection or gathered with friends for a collaborative workshop, the act of crafting becomes a memory in itself. 🖍️👩🎨🎉 These moments enrich the lead-up to your event, transforming what could be a routine task into something joyful and fulfilling.
Furthermore, the adaptability of these stations ensures they can cater to every budget, skill level, and event type. Whether you’re using luxurious metallic finishes or recycled materials, the focus remains on intention and creativity. There’s no right or wrong way to build your invitation station—only what resonates with your event’s theme and your personal style. 🎨🪄
By choosing to incorporate a DIY invitation station, you’re not just preparing for a party; you’re laying the foundation for a memorable experience. Every fold, stamp, and sparkle contributes to an atmosphere that feels curated and warm. So embrace the glue sticks, the glitter, the printed templates, and your imagination. 🧷🖌️💫 With a bit of time and heart, your invitations won’t just inform—they’ll inspire. 💖📩🎊