Immerse yourself in the warm, enchanting world of homemade candles! They are not just sources of soft light but also expressions of creativity, personal touch, and the perfect favors for any occasion. “Candlelight Delights: Homemade Candle Favors for Every Occasion!” unveils the art of crafting beautiful, aromatic, and personalized candles right at home.
From birthdays, anniversaries, weddings, to holiday parties, homemade candles serve as the perfect favor that beautifully complements the theme and sentiment of any occasion. With our detailed guide, you’ll be able to create stunning, eco-friendly candles in a variety of styles, colors, and fragrances. Delight your guests with these DIY tokens that will leave them with lasting memories of your special event.
Prepare to be inspired by a myriad of designs and techniques that will elevate your crafting skills. We will explore the choice of materials, the mixing of fragrances, the inclusion of natural elements, and the process of molding unique shapes. By the end of this journey, you will have a newfound appreciation for the artistry behind these illuminating pieces of home decor. Discover the endless possibilities that lie in a lump of wax and a wick. Stay tuned!
Understanding Candle Making Basics
In the realm of crafts and hobbies, candle making holds a distinct position. By understanding the basic principles of candle crafting, anyone can create beautiful and aromatic homemade candles.
To start, let’s define what a candle is from a technical perspective. A candle is a device that gives off light and sometimes heat, which is fueled by the combustion of a wick immersed in wax. The heat of the flame melts the wax near the wick, drawing it up, allowing it to vaporize and react with oxygen in the air to create heat, light, water vapor, and carbon dioxide.
Components of a Candle
The primary components of a candle are wax, a wick, and any additives such as color or scent. Each component serves a unique purpose in the overall functionality of the candle.
Wax
Wax is the fuel for the candle’s flame. When melted, it is absorbed by the wick and vaporizes to fuel the flame. The type of wax used can affect the burn time, scent throw, and appearance of the candle. The most common types of wax used in candle making are paraffin, soy, beeswax, and palm wax.
Wick
The wick is the heart of the candle. It serves as the fuel delivery system, drawing the melted wax up into the flame where it can be vaporized. The size and type of wick used can greatly affect the burn quality of the candle.
Steps to Creating Homemade Candle Favors
Once you’ve understood the basics of what makes a candle, it’s time to get into the process of making your own. Here are the general steps to follow when making homemade candle favors.
Step 1: Gather Your Materials
You’ll need a variety of materials to start making candles, including wax, wicks, a double boiler, thermometer, containers or molds, and any desired additives such as dyes or fragrance oils.
Step 2: Melt the Wax
Using a double boiler, melt the wax to a specified temperature. Each type of wax has its own recommended melting temperature, so be sure to follow the manufacturer’s guidelines.
Step 3: Add Your Additives
Once the wax is melted, you can add any desired color dyes or fragrance oils. Be sure to stir thoroughly to ensure even distribution throughout the wax.
Step 4: Prepare Your Container or Mold
While your wax is cooling slightly, prepare your container or mold by securing the wick in place. This can typically be done with a wick centering device or by simply adhering the wick to the bottom of the container with hot glue or a sticky tab.
Step 5: Pour the Wax
Once your wax has cooled to the recommended pouring temperature, slowly pour it into your prepared container or mold. Be sure to leave a bit of room at the top.
Step 6: Let it Cool
Allow the wax to cool completely. This can take anywhere from a few hours to overnight, depending on the size of your candle and the type of wax used.
Step 7: Cure the Candle
Curing your candles, especially if they are scented, is a critical but often overlooked step. This is particularly important for soy and paraffin wax candles that have been infused with fragrance oils. Curing means allowing the candle to sit untouched in a cool, dry area so that the wax and fragrance can bind effectively. Ideally, let your candles cure for at least 3 to 7 days before burning or gifting them. This step dramatically improves scent throw, both hot (when lit) and cold (unlit), and ensures your homemade candle performs as beautifully as it looks.
Step 8: Test Burn for Quality Control
Testing your candle ensures it performs well in real-world conditions. It’s an essential quality control step, especially if you plan to give them as favors or sell them. Light your candle in a controlled environment and observe it over several hours. You’ll want to check the evenness of the burn, how much wax is consumed, the strength of the scent, and whether the wick maintains a steady flame. If the wax pools too quickly or the flame flickers excessively, adjustments may be needed. Testing also helps you determine the ideal wick size and wax-to-fragrance ratio for future batches.
Step 9: Add Finishing Touches
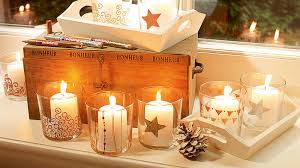
With your candle fully cured and tested, it’s time to focus on presentation. The finishing touches you add can greatly enhance the overall appeal and personalization of your candle favors. Consider decorating the lids or jars with twine, washi tape, or fabric. You might also add a charm, tag, or tiny note with a meaningful message or the event’s details. Even a simple printed sticker with the event name and date can make your candle feel like a polished, custom-made gift. This is your chance to reflect the theme or spirit of your occasion creatively.
Selecting Containers for Your Candle Favors
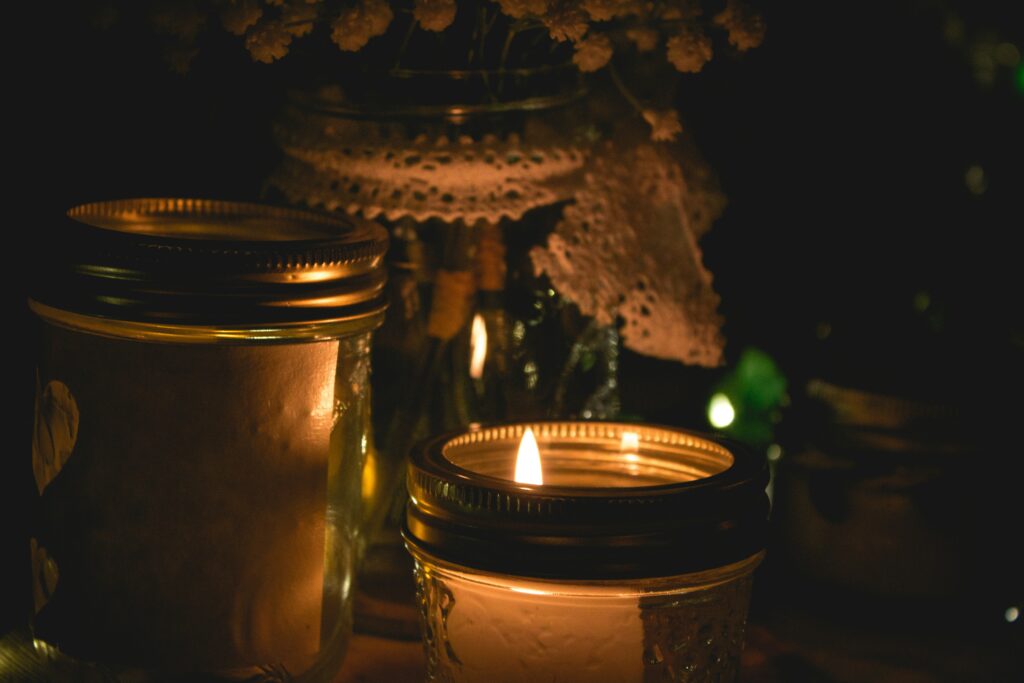
Choosing the right container is not only about aesthetics but also about safety and functionality. Glass jars are classic choices because they’re transparent, allowing guests to admire the candle’s color and texture. Mason jars, small jam jars, or votive holders are all popular and widely available. Tin containers offer a rustic or minimalist look and are travel-friendly. Ceramic vessels provide a unique touch, especially when handmade or locally sourced. Regardless of the material, ensure the container is heat-resistant and free from cracks or defects. A well-chosen container adds to both the usability and visual charm of your homemade candles.
Exploring Advanced Techniques
Once you’ve mastered the basic candle-making steps, you might want to explore more advanced techniques to elevate your creations. Layering different colored waxes can create visually striking striped candles. Using embeds such as dried flowers, herbs, or even small crystals can add a decorative element, though they must be placed safely away from the flame path. You might experiment with swirling two or more wax colors together for a marbled effect. Adding texture to the outside of pillar candles or using silicone molds for detailed shapes also expands your creative possibilities.
Creating Themed Candle Favors
Matching your candle favors to the theme of your event makes them even more memorable. For baby showers, consider pastel-colored candles with soft scents like baby powder, lavender, or chamomile. For weddings, classic hues like ivory, blush, or navy combined with romantic fragrances like rose, sandalwood, or jasmine are always popular. Holidays lend themselves well to bolder colors and seasonal aromas such as cinnamon, pine, peppermint, or pumpkin spice. For birthdays or celebrations, think vibrant shades with fun scents like birthday cake, citrus burst, or vanilla bean.
Eco-Friendly and Sustainable Practices
Many people appreciate eco-friendly products, and making your candle favors sustainably can be a significant plus. Choose natural waxes like soy or beeswax, which are biodegradable and renewable. Opt for cotton or wood wicks instead of those with metal cores. Avoid synthetic dyes and go for natural pigments or leave your candles undyed for a rustic look. Recyclable or reusable containers further reduce waste. Even the packaging can reflect sustainability—consider using kraft paper, jute twine, or biodegradable cellophane instead of plastic wrapping. Eco-conscious candles can become a statement of your values as well as a beautiful gift.
Custom Labeling Ideas
Labeling your candles not only provides essential information but also adds a professional touch. You can design labels to include the candle’s name, scent, ingredients, burn time, or event date. Many people use label templates from design software or online tools like Canva or Adobe Express. If you’re feeling crafty, consider hand-lettering labels or using stamps. Waterproof or oil-resistant labels are ideal to prevent smudging. Adding a QR code that links to a thank-you message, photo gallery, or event page is a unique, modern twist. Labeling enhances branding if you plan to turn candle-making into a small business.
Hosting a Candle-Making Party
Candle-making can be a delightful group activity, perfect for bridal showers, birthdays, or creative get-togethers. Setting up a candle-making station with all the necessary supplies, safety gear, and step-by-step guides allows guests to participate and take home a favor they made themselves. It’s an engaging, hands-on experience that doubles as entertainment and a keepsake. Provide a variety of fragrance oils, dyes, and containers so each guest can personalize their creation. Playing soft background music and offering refreshments can make the event even more enjoyable. It’s a creative way to make memories while crafting something meaningful.
Troubleshooting Common Candle Issues
Even experienced crafters sometimes face challenges in candle-making. If your candle tunnels—burns down the center while leaving a ring of unused wax—it may be due to a wick that’s too small or not burning long enough on the first use. If your candle smells great cold but lacks scent when burning, try adjusting the fragrance load or curing time. Frosting, a white crystalline layer on soy candles, is harmless but can be minimized by pouring at the right temperature. Wet spots, where wax pulls away from the container, often happen due to cooling too quickly. Patience and practice are key to mastering these issues.
Incorporating Essential Oils
While fragrance oils are specially designed for candles, essential oils are a natural alternative. They offer therapeutic benefits and a more subtle aroma. However, essential oils have lower flash points and don’t always perform well in wax, so it’s important to test carefully. Popular essential oils for candles include lavender, eucalyptus, peppermint, and lemon. Use high-quality, pure essential oils and keep in mind that they often require a higher volume to achieve noticeable scent throw. Blending essential oils can create unique and balanced aromas, like citrus-lavender for relaxation or rosemary-mint for an energizing touch.
Customizing Your Candle Favors
Now that you have a general understanding of how to make candles, let’s delve into how you can customize them for any occasion.
Choosing the Right Scent and Color
The scent and color of your candle can set the mood for any event. For a wedding, you might opt for a romantic scent like rose or vanilla and a soft color like pink or white. For a holiday party, consider a festive scent like cinnamon or pine and a bold color like red or green.
Decorating Your Candle
Decoration is another way to customize your candles. You can use a variety of materials such as ribbons, beads, or even dried flowers. Just make sure any decoration is safely away from the flame when the candle is lit.
Labeling and Packaging
Finally, consider how you will package and label your candles. A beautifully designed label can make your homemade candle favors look professional and thoughtful. Packaging can include simple things like cellophane wrap or more elaborate boxes or bags.
Conclusion
Candle making is a fun and rewarding hobby that allows for endless creativity. With the basics under your belt, you can begin crafting homemade candle favors that will delight your friends and family on any occasion.
Making your own candles not only allows you to control the quality of the materials used but also gives you the opportunity to create something truly unique and personal. Whether you’re crafting a simple, soothing lavender candle for a relaxing evening at home or designing a set of festive, cinnamon-scented candles for the holiday season, the process of making your own candles is a delightful experience that combines both science and art in a wonderfully aromatic way. Happy crafting!
Conclusion
In conclusion, “Candlelight Delights: Homemade Candle Favors for Every Occasion!” expertly enlightens us on the art of creating charming, personalized candle favors. Not only are these homemade gifts cost-effective, but they also add a special, heartfelt touch to any event. The uniqueness of these candle favors, coupled with the freedom to customize them as per occasion or recipient’s preferences, amplifies their appeal, making them a fantastic choice for any event, be it a festive gathering or an intimate celebration.
Moreover, the process of creating these DIY candle favors, as outlined in the article, is straightforward and enjoyable. It’s an opportunity to explore creativity and even form lasting memories if done in a group setting.
Above all, these candles are not just visually pleasing gifts, they serve a functional purpose too. They can illuminate a space, provide a soothing aroma, and even act as a keepsake to remember a special occasion.
In a world where sustainable, personalized, and thoughtful gifts are gaining traction, these homemade candle favors truly shine. Let’s light up our lives and the lives of our loved ones with these delightful candlelight delights. As we’ve learned, they’re not just candles; they’re symbols of warmth, love, and celebration.